Crafting Memories: The Ultimate Guide to Baby's First Year Photo Frame Laser Cut Designs
There is something profoundly magical about watching a child grow during their first twelve months. One moment they are swaddled in a hospital blanket, and the next, they are attempting their first wobbly steps. For parents, grandparents, and crafters alike, capturing this fleeting timeline is a priority. This is where the Baby's First Year Photo Frame Laser Cut design becomes an invaluable tool. Unlike a standard store-bought album, a laser-cut frame offers a bespoke, tactile way to display a year of milestones, turning a digital collection of phone photos into a cherished heirloom.
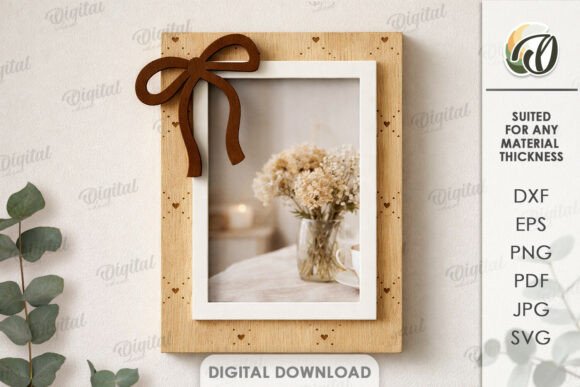
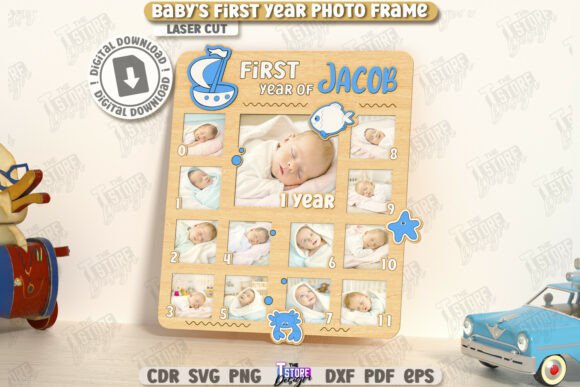
At its core, this product is a digital blueprint designed specifically for CNC machines and laser cutters. It allows makers to transform flat sheets of wood, acrylic, or MDF into an intricate, multi-layered display. The design typically features twelve distinct sections or pockets, each designated for a specific month, often culminating in a central spot for a birth announcement or a one-year portrait. What makes this particular file stand out is its precision engineering for manufacturing; it comes with clear instructions where red lines indicate cutting paths and black lines denote engraving areas. This distinction is crucial for anyone looking to produce professional-grade results without spending hours manually setting parameters in their software.
Real-World Applications for Makers and Small Businesses
The versatility of a Baby's First Year Photo Frame Laser Cut extends far beyond a single hobbyist project. For small business owners operating on platforms like Etsy or at local craft fairs, this file represents a scalable product opportunity. The demand for personalized baby gifts is perennial; new parents are constantly seeking unique items that feel special and thoughtful. By utilizing this CNC file, a creator can produce high-quality frames in a fraction of the time it would take to build one by hand.
Consider the scenario of a custom gift shop. A customer walks in wanting a present for a friend's baby shower. With this digital asset, the shop owner can quickly cut a frame from premium walnut or cherry wood, engrave the baby's name and birth date along the border, and have a finished product ready within an hour. The ability to swap materials allows for different price points—offering a budget-friendly MDF version for mass markets and a high-end hardwood version for luxury clients. Furthermore, because the file includes multiple formats (SVG, EPS, PNG, PDF, and DXF), it integrates seamlessly into various workflows, whether the business uses a Glowforge, an xTool, or an industrial CO2 laser.
Navigating Software Compatibility and File Formats
One of the most practical aspects of acquiring a high-quality laser cut file is understanding how it interacts with your specific software ecosystem. This product archive is comprehensive, providing five different file types to ensure compatibility across the board. However, experience teaches us that not all software handles vector data equally. A critical observation for users, particularly those relying on LightBurn, is the potential for dimension distortion when importing SVG files. SVGs are fantastic for web graphics and some cutting plotters, but they can sometimes interpret units differently when moved between design programs and laser controllers.
To mitigate this risk, seasoned operators often recommend bypassing the SVG entirely if you are working within LightBurn. Instead, reaching for the included DXF file is frequently the smarter move. DXF (Drawing Exchange Format) is an industry standard for CAD data and tends to preserve exact dimensions and scale much more reliably in laser software. By choosing the DXF, you ensure that the slots for the photos fit perfectly and that the overall frame dimensions match your material sheet size without unexpected scaling issues. This small technical choice can save significant frustration and material waste, especially when working with expensive hardwoods.
Tailoring the Design for Different Audiences
The beauty of having access to the source files lies in the ability to customize. While the base design is a complete solution, different users benefit from tweaking the elements to suit their specific audience. For instance, a community center running a workshop for new parents might use the New Born Photo Frame Home Décor Gift Idea as a group project. They could simplify the process by using pre-colored acrylics, allowing participants to focus on assembly rather than finishing. In this context, the clarity of the cut lines (red) versus engrave lines (black) serves as an excellent teaching tool for beginners learning how lasers interact with materials.
On the other end of the spectrum, professional interior designers might utilize these frames as part of a nursery styling package. Here, the focus shifts to aesthetics and finish. They might opt for a matte black acrylic for a modern, minimalist look or a natural birch plywood for a Scandinavian vibe. The layered nature of laser-cut designs adds depth and shadow, creating a 3D effect that flat printing cannot achieve. This textural quality makes the frame a standout piece of wall art rather than just a photo holder.
Practical Considerations Before You Cut
Before sending your file to the machine, there are several practical factors to consider to ensure the best outcome. First, verify your machine's compatibility. While the file is universal in format, your machine must be able to handle the level of detail in the engraving and the precision of the cuts. Testing on a scrap piece of the same material is always advisable to dial in power and speed settings.
Material selection plays a huge role in the final appearance. Wood offers warmth and grain variation, making every frame unique, but it requires sanding and potentially sealing after cutting. Acrylic provides a sleek, modern finish and comes in endless colors, but it demands careful attention to flame polishing edges if you want them crystal clear. Additionally, consider the thickness of the material. The slots in the Baby's First Year Photo Frame Laser Cut design are calculated for specific material thicknesses. If you deviate from the recommended thickness without adjusting the file kerf offsets, your joints may be too loose or impossible to assemble.
Another consideration is the intended lifespan of the display. Since this frame is meant to hold photos for a full year, ensure the backing mechanism or the slot design securely holds the pictures in place, even if the frame is hung on a wall. Some creators add a small lip or use a magnetic backing system to keep the monthly photos from slipping out over time.
Unlocking Creative Potential
Ultimately, this digital product is more than just a set of lines on a screen; it is a gateway to creativity. Whether you are a parent wanting to document your own child's journey, a grandparent looking for a meaningful project, or an entrepreneur building a inventory of handmade goods, the possibilities are vast. The inclusion of various file types ensures that no matter your preferred workflow, you have the tools you need. And should you find yourself needing a specific alteration—perhaps a different color for a PNG preview or a modified file type—the openness of the creator to provide support adds an extra layer of value.
By leveraging these precise CNC files, you bridge the gap between digital design and physical memory-keeping. The result is a tangible object that tells a story, celebrating the rapid growth and precious moments of a baby's first year in a way that feels both modern and timeless. As you explore your future releases and expand your library of projects, remember that the best designs are those that solve a problem while sparking joy—and a custom laser-cut photo frame does exactly that.